Calendars
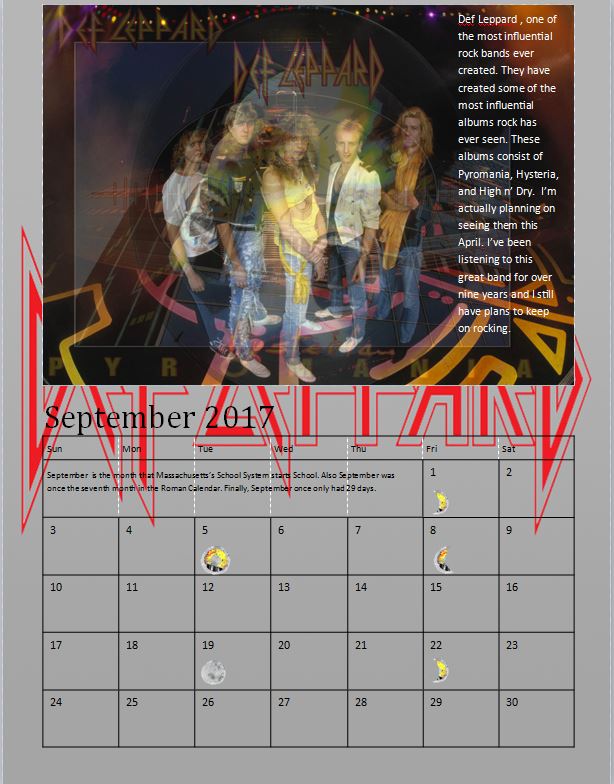
Def Leppard , one of the most influential rock bands ever created. They have created some of the most influential albums rock has ever seen. These albums consist of Pyromania, Hysteria, and High n’ Dry. I’m actually planning on seeing them this April. I’ve been listening to this great band for over nine years and I still have plans to keep on rocking.
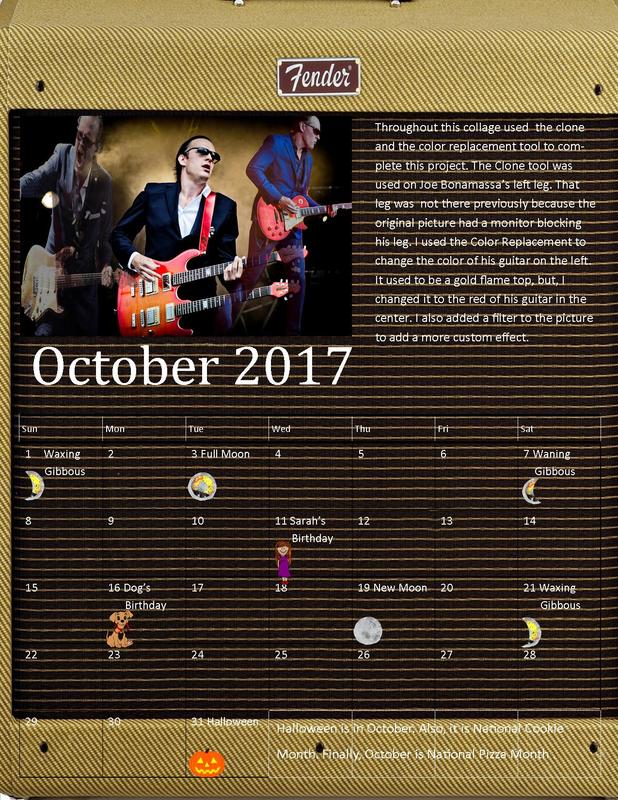
Throughout this collage used the clone and the color replacement tool to complete this project. The Clone tool was used on Joe Bonamassa’s left leg. That leg was not there previously because the original picture had a monitor blocking his leg. I used the Color Replacement to change the color of his guitar on the left. It used to be a gold flame top, but, I changed it to the red of his guitar in the center. I also added a filter to the picture to add a more custom effect.
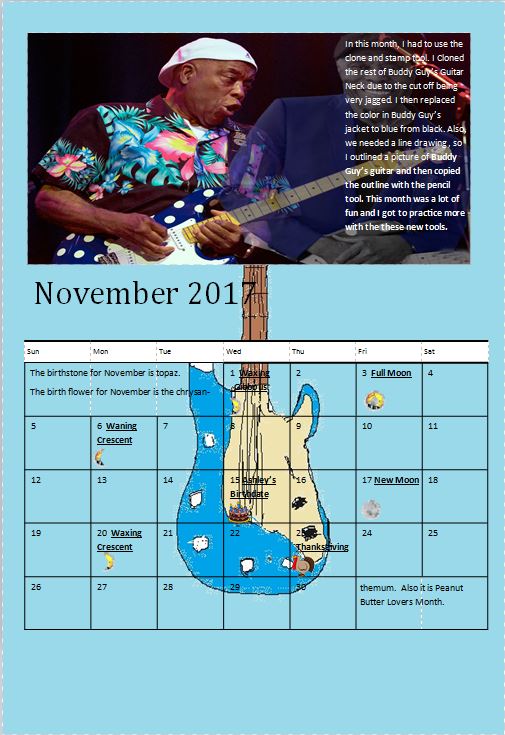
In this month, I had to use the clone and stamp tool. I Cloned the rest of Buddy Guy’s Guitar Neck due to the cut off being very jagged. I then replaced the color in Buddy Guy’s jacket to blue from black. Also, we needed a line drawing , so I outlined a picture of Buddy Guy’s guitar and then copied the outline with the pencil tool. This month was a lot of fun and I got to practice more with the these new tools.
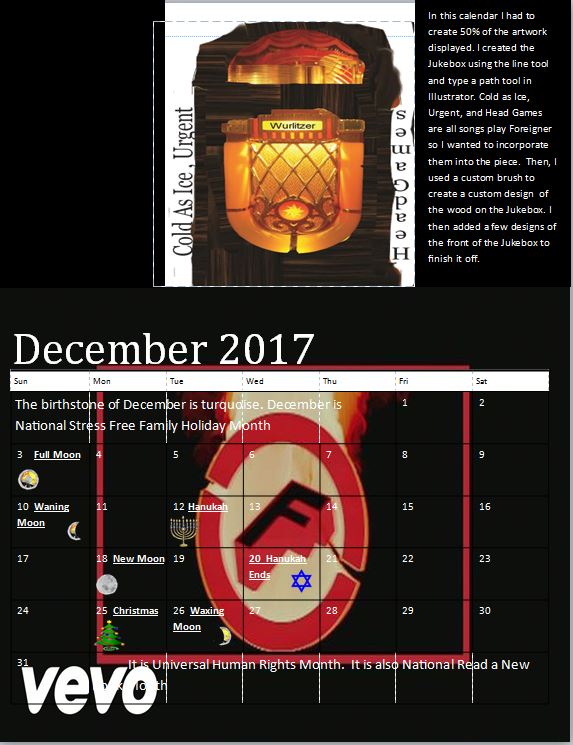
In this calendar I had to create 50% of the artwork displayed. I created the Jukebox using the line tool and type a path tool in Illustrator. Cold as Ice, Urgent, and Head Games are all songs play Foreigner so I wanted to incorporate them into the piece. Then, I used a custom brush to create a custom design of the wood on the Jukebox. I then added a few designs of the front of the Jukebox to finish it off.
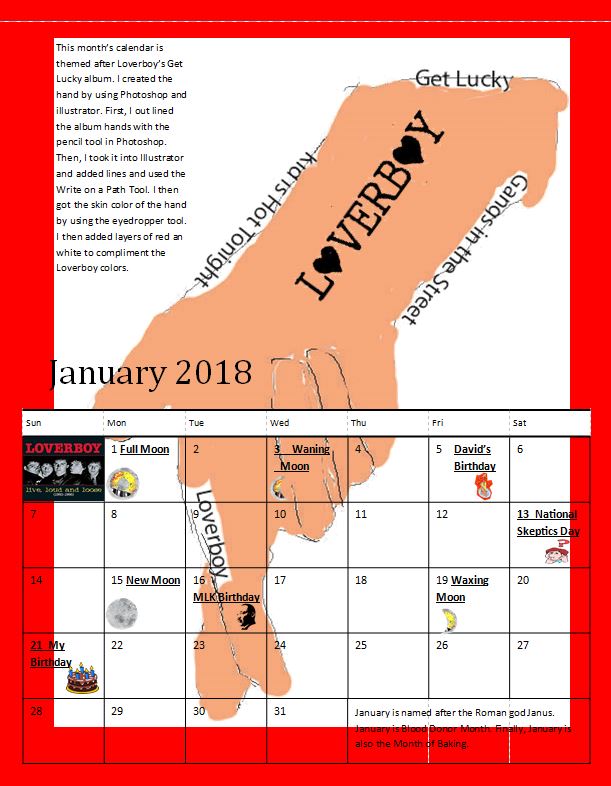
This month’s calendar is themed after Loverboy’s Get Lucky album. I created the hand by using Photoshop and illustrator. First, I out lined the album hands with the pencil tool in Photoshop. Then, I took it into Illustrator and added lines and used the Write on a Path Tool. I then got the skin color of the hand by using the eyedropper tool. I then added layers of red an white to compliment the Loverboy colors.
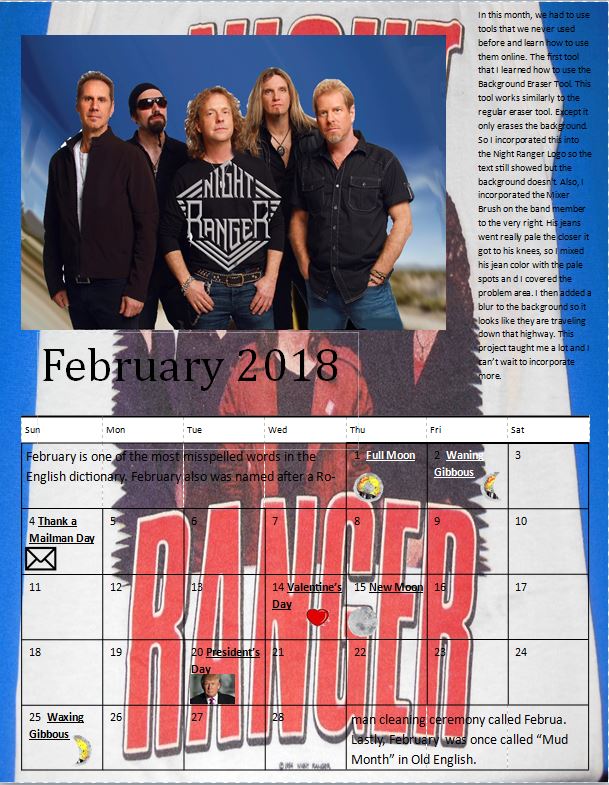
In this month, we had to use tools that we never used before and learn how to use them online. The first tool that I learned how to use the Background Eraser Tool. This tool works similarly to the regular eraser tool. Except it only erases the background. So I incorporated this into the Night Ranger Logo so the text still showed but the background doesn't. Also, I incorporated the Mixer Brush on the band member to the very right. His jeans went really pale the closer it got to his knees, so I mixed his jean color with the pale spots an d I covered the problem area. I then added a blur to the background so it looks like they are traveling down that highway. This project taught me a lot and I can’t wait to incorporate more.
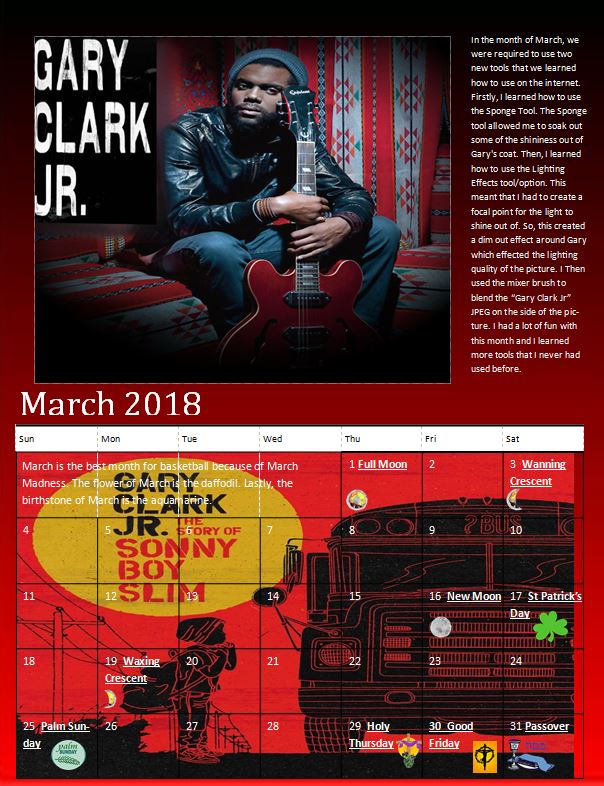
In the month of March, we were required to use two new tools that we learned how to use on the internet. Firstly, I learned how to use the Sponge Tool. The Sponge tool allowed me to soak out some of the shininess out of Gary's coat. Then, I learned how to use the Lighting Effects tool/option. This meant that I had to create a focal point for the light to shine out of. So, this created a dim out effect around Gary which effected the lighting quality of the picture. I Then used the mixer brush to blend the “Gary Clark Jr” JPEG on the side of the picture. I had a lot of fun with this month and I learned more tools that I never had used before.
